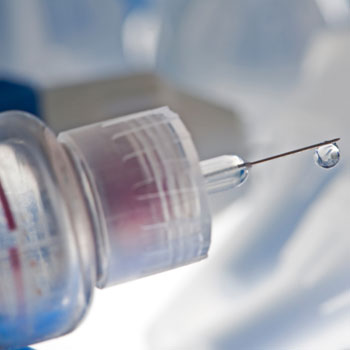
Diabetics: Do You Really Know How to Use an Insulin Pen?

If you have diabetes, then you may worry about how to use an insulin pen. But it’s simple and safe, as long as you follow the steps below.
Managing diabetes got a lot more convenient with the invention of insulin pens. Before that, diabetics had to use a syringe and a vial of insulin, fumble around with the tiny pieces, measure out just the right of insulin and then store the vial again — not exactly travel-friendly for our on-the-go world, is it?
Thankfully, the process became less painless with the evolution of the insulin pen. They’re like portable, easy-to-use gifts to diabetics. Now you can carry everything you need to take care of yourself, right in your pocket or purse (along with everything else in there). They’re convenient, accurate and discreet.
Insulin pens are basically oversized ink pens that come pre-filled with the perfect combination of insulin diabetics need. The cartridge contains up to 300 units of insulin, often a combination of two types – whatever your doctor decides is the best mixture for you.
The cartridge contains multiple doses, so depending on how much insulin a patient needs, the same person can use one insulin pen several times. The pens come with multiple needles, which should be changed after every use. After they are used, they are disposable. Boxes of insulin pens are sold in packs of five, for 1,500 units of insulin total.
New, unused insulin pens should be refrigerated. However, after the first use, the pen can be kept at room temperature (which means travel with it, take it to run errands, pick up the kids, go shopping) — below 86 degrees Fahrenheit.
Keep It to Yourself!
Sharing isn’t caring in this case. Insulin pens should be used by only one person. This is crucial for preventing disease transmission and infections.
When an insulin pen is used to inject insulin into a person’s skin, there may be a small backflow of blood or skin cells into the cartridge. If another person then uses the same pen, any diseases or infections can be passed from one person to the next. It’s not enough just to change the needle; different pens must be used for different people.
In 2009, the Centers for Disease Control and Prevention became aware that some health care professionals and hospitals were improperly using insulin pens and sharing them among patients. The Food and Drug Administration even issued an alert that insulin pens are meant for single-patient use.
This is why it’s important for everyone – both individuals and health care professionals – to know the proper use of insulin pens.
How to Use an Insulin Pen in 7 Simple Steps
We’ve outlined seven simple steps to make sure you get it right. If you’re just getting familiar with the insulin pen, it’s always recommended that you have a health care professional or pharmacist demonstrate in person first.
Step 1: Stop, Prep and Roll
If you’re using intermediate- or long-acting insulin, it may look milky or cloudy when you first pick up the pen. If it does, gently roll the insulin pen between your palms for about 15 seconds until it mixes and clears up. This only needs to be done if the insulin if it looks cloudy.
Step 2: Noodle with the Needle
Be sure to use a new needle with each injection. Remove the paper tab from the pen needle and screw the needle onto the end of the insulin pen. Remove the outer and inner cover of the needle to expose it.
Step 3: Prime the Pen
Clear any air from the tip of the needle. To do this, turn the dosage dial to 1 or 2 units, hold the needle straight up and press the dosing button until you see insulin come out of the top. If you don’t, repeat this step until you do. The dial should be back at 0 before you begin your injection.
Step 4: Dial Your Dose
Turn the dial to point to the amount you need. It can be turned backward and forward. Only the amount you choose will be dispensed.
Step 5: Pick a Place to Stick
Common places to inject insulin are the abdomen, between the ribs and pubic line at least 3-4 inches from the navel, the tops of the thighs, or the backs of the arms.
Imagine a checkerboard there and inject in a different “box” each time. Avoid moles or any places with scarring from an old surgery. You also may choose to prep the area first to help ease the pain (see Easing Insulin Injection Pain section below).
Step 6: Inject the Insulin
It’s time to actually do this. There are four simple steps of the actual injection:
After the injection, you may notice a bit of bruising or a drop of blood. This is normal. You can use a cotton ball or tissue to blot or pat the area, but do not massage it.
Step 7: Set Up for Future Use
Place the cover back on the needle and twist it to remove it. Discard it in a hard plastic container (no needles sticking out of garbage bags!) and place the outer cap back on the pen.
Easing Insulin Injection Pain
If you are sensitive to pain, insulin injections may cause discomfort. There are a couple ways to help ease the pain of insulin injections:
Numbing creams: Doctors can prescribe numbing creams that take about 30 minutes to be fully effective. Rub a small amount onto the injection area before it’s time for your injection.
Ice: A free alternative to creams that also can be effective to help ease injection pain. Simply rub an ice cube on the area for a few seconds first, then sterilize with alcohol before injecting.

